


U2/U3 COMBO ROM ADAPTER PCB FOR GOTTLIEB® SYSTEM 80 AND SYSTEM80A BOARDS
 We only sell the printed circuit board (PCB). We do not supply any component nor the EPROM nor its content. You have to assemble the adapter by following the instructions below.
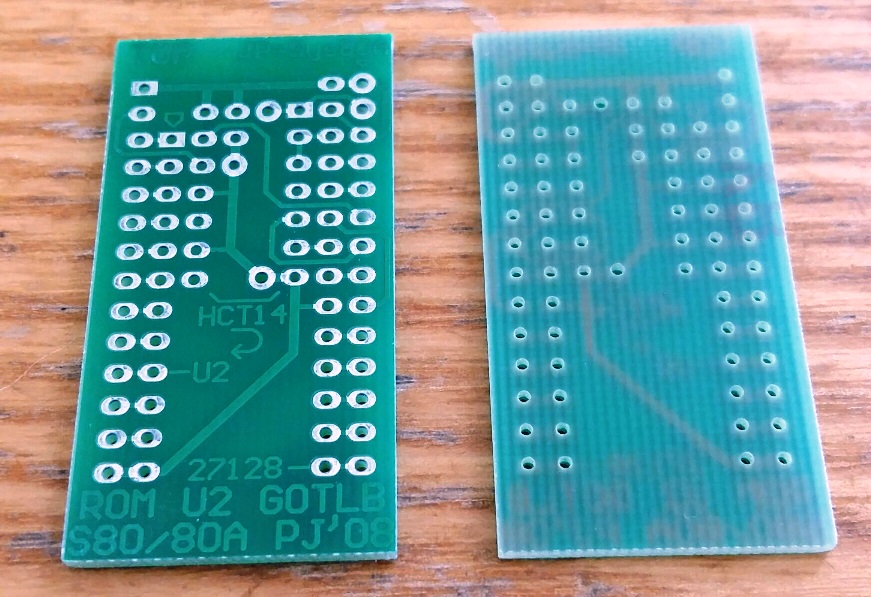
ASSEMBLING
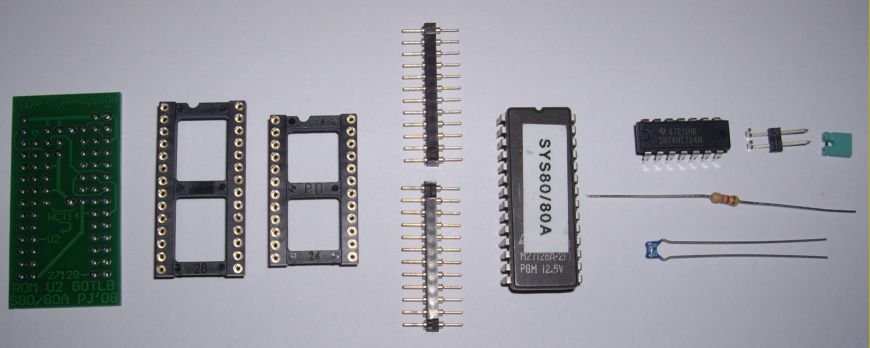
STEP 1: components required
you need:- the printed circuit board
- a 28 pin machine tool IC socket
- a 24 pin machine tool IC socket
- 2 male-male 12 pin SIP machine tool headers (no HE-14 as the pins are too big and would damage the adapter PCB AND the CPU board!)
- a programmed 27128 EPROM (or 27256, see below)
- a 74HCT04 (or 74HCT14)
- 2 HE-14 headers, preferably angled
- a jumper
- a 4.7K 1/4W resistor (or any value between 1K and 10K)
- a 100nF non polarised capacitor (the smallest one you can find), pitch 2.54mm or 5.08mm
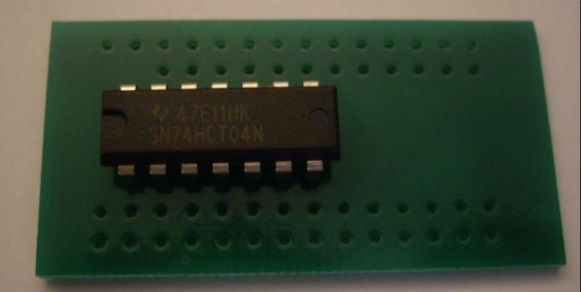
STEP 2: the integrated circuit
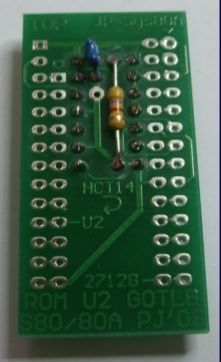
Place the 74HCT04 on the components sideSolder it, then cut its legs (to prepare step 5).
STEP 3: the resistor and the capacitor
Place them on the solder side as in the following picture.Place the capacitor, depending on its pitch (2.54mm or 5.08mm), either on the 2 above solder pads (see pic), or between the above pad and the below pad.
Be sure that their legs are very short and cut accurately just above the PCB surface.
STEP 4: the male-male headers
Insert both headers in the 24 pin socket, thin pins in the socket, thick pins in the PCB.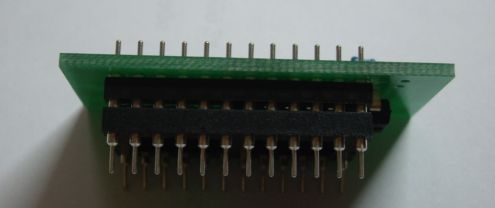
Take a look at the picture below to see where the pins go: the pin 1 is indicated by an arrow and a square pad.
This is the pin that will be inserted into the pin 1 of U2 on the host CPU board.
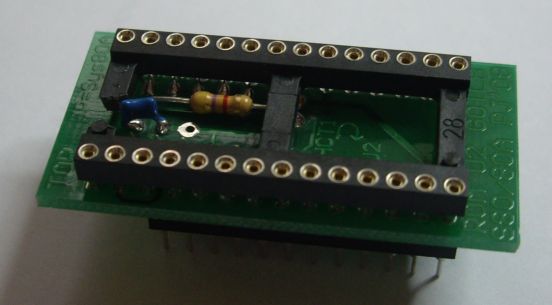
STEP 5: the EPROM socket
Insert the 28 pin socket into the 2 other rows of 14 pins.Pin 1 has a square pad, just below the "TOP" marking.
If the socket doesn't insert correctly because of the capacitor, do NOT force, bend the capacitor or cut the socket plastic housing as shown on the picture.
then solder the socket.
For pin 1 to 14, put the soldering iron tip between the PCB and the plastic housing (no matter if it slightly melts).
The solder mask on the PCB will limit the risk of soldering 2 pads together or to an adjacent trace.
If it happens, use desoldering braid to remove the old solder in excess and solder again.
Use a flashlight to check for short circuits by lighting the PCB from the bottom side (see picture at step 7).
The most difficult part is soldering pins 15 to 28 as they are located behind the pins of the male-male connector soldered at step 4.
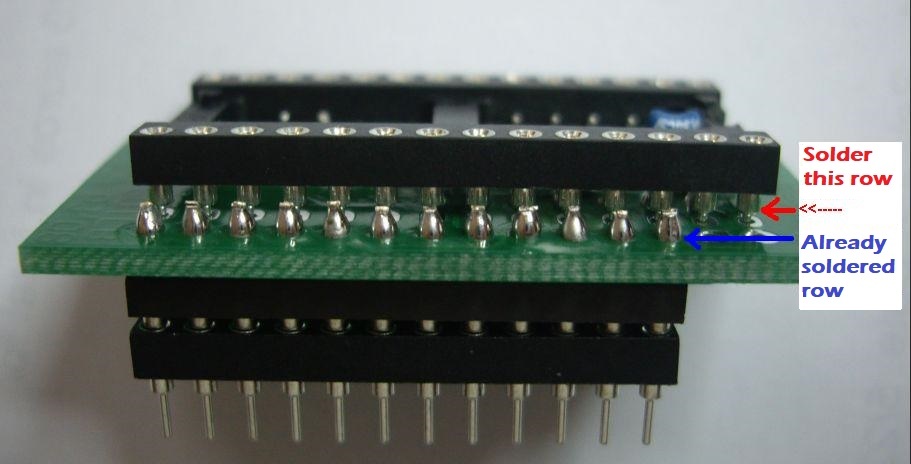
Once soldered, we get this:

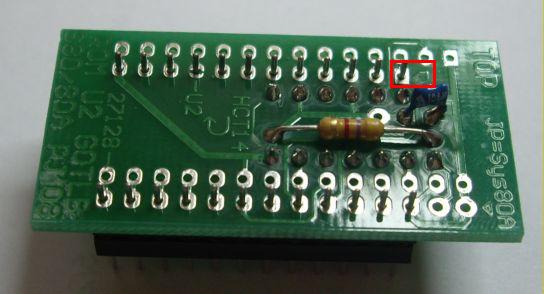
STEP 6: the jumper
Solder the 2 HE-14 pins in the 2 last pads on top right corner.Preferably use angled pins so they won't "rub" against the host CPU board.
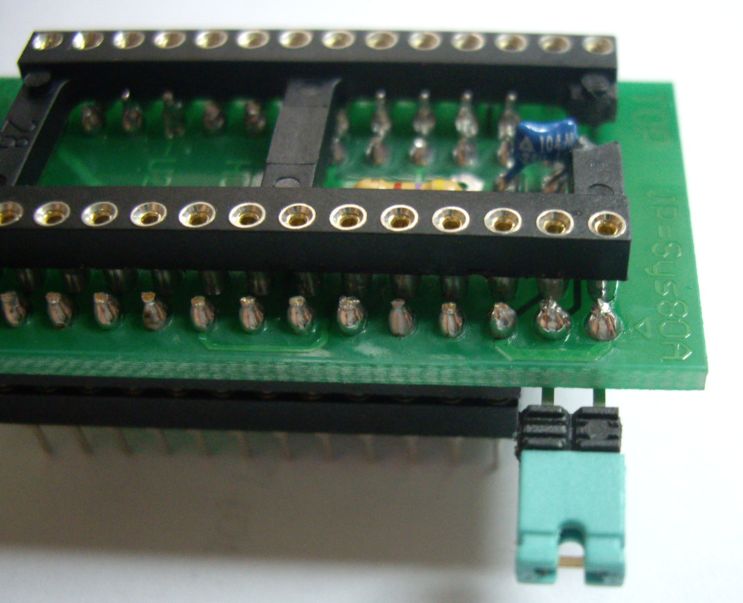
The jumper allows to select the proper U2/U3 ROMs:
- installed (on) = system80A removed (off) = system80
STEP 7: last check and EPROM
I always adwise to check for any short circuit with a backlighted magnifying glass, particularly after the soldering at step 5.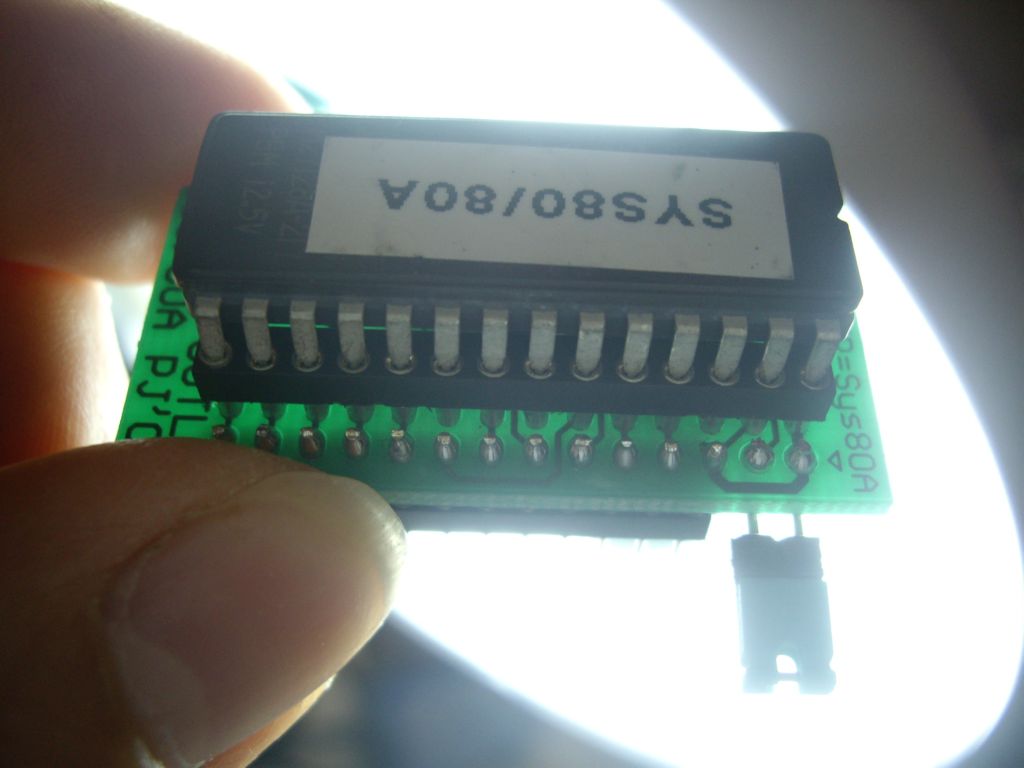
Then insert the programmed 27128 EPROM in the 28 pin socket, pin 1 towards the "TOP" marking.
The binary content of the EPROM has to be created on your computer in DOS mode. It's made by using the original U2 and U3 chips content that you can find on the web (pinmame for example):
copy /V sys80A_U2.bin /B + sys80A_U3.bin /B + sys80_U2.bin /B + sys80_U3.bin /B final_27128.bin /B
Note: we can use a 27256 EPROM, in this case write 2 times the content produced by the DOS command above.Warning: the rights on the contents of the original U2 and U3 ROMs are owned by MONDIAL group. You must own the original ROMs to be able to use them.
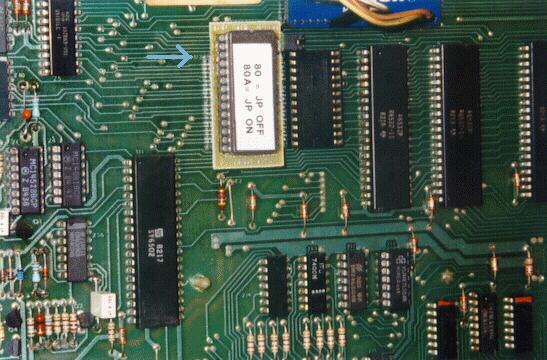
STEP 8: set-up in a game
Remove the 2 original U2 and U3 ROMs and solder a 24 pin socket at U2 (on the left) if the CPU board didn't have any (system80).U3 (on the right) remains empty.
Then select the proper configuration with the jumper (step 7), then plug the adapter at U2, pin 1 being on the top left (which corresponds to the circled arrow at step 4b and to the blue arrow on the picture below).
Order or shipping quote: it's easy, add the board in the cart and let us guide you. No registration needed and no account to open!
12 €
 Add to cart
 13 USD
Estimated value. Your bank or Paypal
may apply a different exchange rate.
All payments to be made in euros (€)
 18 CAD
Estimated value. Your bank or Paypal
may apply a different exchange rate.
All payments to be made in euros (€)
 20 AUD
Estimated value. Your bank or Paypal
may apply a different exchange rate.
All payments to be made in euros (€)
 11 GBP
Estimated value. Your bank or Paypal
may apply a different exchange rate.
All payments to be made in euros (€)
 12 CHF
Estimated value. Your bank or Paypal
may apply a different exchange rate.
All payments to be made in euros (€)
Estimated value. Your bank or Paypal
may apply a different exchange rate.
All payments to be made in euros (€)
Estimated value. Your bank or Paypal
may apply a different exchange rate.
All payments to be made in euros (€)
Estimated value. Your bank or Paypal
may apply a different exchange rate.
All payments to be made in euros (€)
Estimated value. Your bank or Paypal
may apply a different exchange rate.
All payments to be made in euros (€)
Estimated value. Your bank or Paypal
may apply a different exchange rate.
All payments to be made in euros (€)